GeoCLIM/help
From CHG-Wiki
Jump to navigationJump to search
The GeoCLIM Manual covers the most commonly used tools in the GeoCLIM software
Contents
Installation and set up
- After you have downloaded the GeoCLIM installation msi file, double-click it to install it. Accept all the defaults in the installation steps.
- You can run the GeoCLIM from the Start Menu or from the desktop.
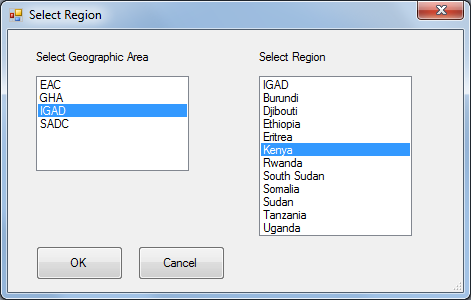
- The first time you run the GeoCLIM, you will get a dialog box prompting you to select a a geographic area. Select the geographic area you want to work in (e.g. IGAD). When you have selected a geographic area, you will be presented a list of "regions". Select your "region" of interest (e.g. "Kenya"). When you have selected a geographic area and a region, click OK. The selected region will become the default region for which all analyses will be done in the GeoCLIM, until you change to a different region in the GeoCLIM settings
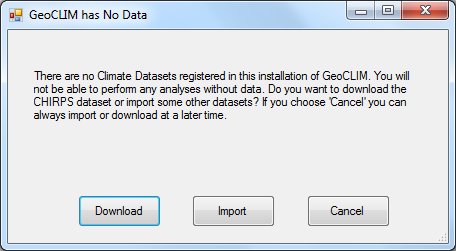
- If this is the first time you are installing the program, GeoCLIM will detect that there is no GeoCLIM data on your computer and will prompt you whether you want to download or import some GeoCLIM data. It is preferable to import data rather than download it, as downloading can take a very long time.
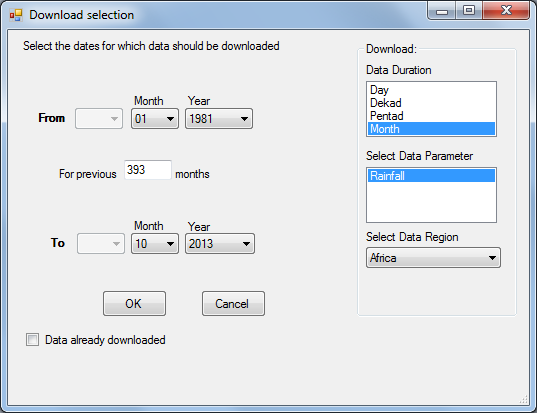
- If you have some data from the GeoCLIM CD, select "Import" to import the data. If you do not have data to import, select the "download" option. You will get a box which looks like the one below.
- Select the data duration, the data parameter, and the data region as well as the dates you want to download data for. If you use the default, which is monthly rainfall data for Africa, the data begins at 1981, and you can select your dates accordingly, then click OK.
- Downloading all the data may take a few hours, depending on the speed of your connection.
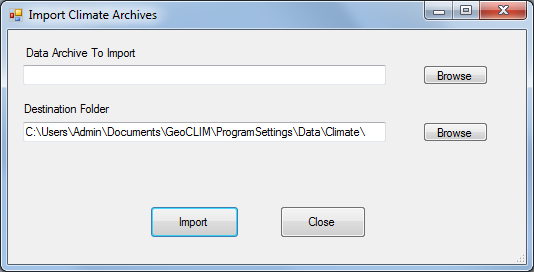
- If you decided to import the data (which takes a much shorter time than downloading), you will be presented with the dialog box which looks like the one below:
- Press the browse button at the top right to select the GeoCLIM data archive, then click the "Import" button to import the data.
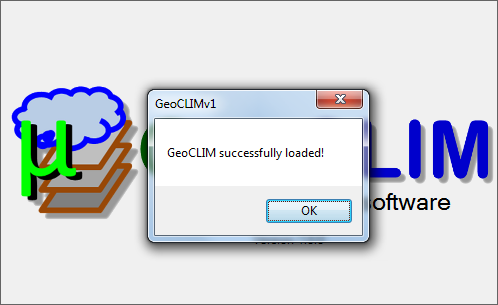
- When you have finished ingesting data (either by downloading or installing), click the GeoCLIM icon in the Windows Taskbar, and you will see a message written "GeoCLIM successfully loaded". Click OK to close the message and you can start using GeoCLIM.
- Press OK to start using the GeoCLIM
Overview of GeoCLIM tools
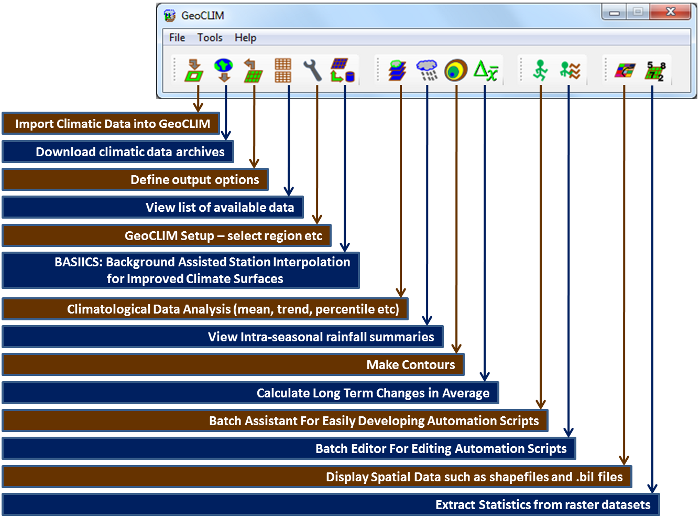
Below is an overview of the main tools available in the GeoCLIM, from the GeoCLIM toolbar.
More tools are available from the menu system.
GeoCLIM Data Managament Tools
Tamuka100 11:36, 14 November 2013 (PST)
Import climatic data into GeoCLIM
(coming soon)
Download climatic data archives
(coming soon)
Define output options
(coming soon)
View list of available data
(coming soon)
BASIICS: Background Assisted Station Interpolation for Improved Climate Surfaces
(coming soon)
Create archives
(coming soon) Tamuka100 11:36, 14 November 2013 (PST)
Change GeoCLIM settings
(coming soon)
Analytical tools
Climatological data analysis
(coming soon)
View intra-seasonal rainfall summaries
(coming soon)
Make contours
(coming soon)
Calculate Long-term change in averages
(coming soon)
Automation tools
Batch assistant for developing automation scripts
(coming soon)
Batch editor for editing automation scripts
(coming soon)
GIS tools
Displaying spatial data
(coming soon)
Extract statistics timeseries from raster datasets
(coming soon)
Reclassifying rasters
(coming soon)
Clipping rasters
(coming soon)
Examples
(coming soon)

