Difference between revisions of "GeoCLIM/help"
From CHG-Wiki
Jump to navigationJump to search (Created page with "=Installation and set up= * After you have downloaded the GeoCLIM installation file GeoCLIM, click on the GeoCLIM msi file to install it. Accept all the defaults in the in...") |
|||
| Line 4: | Line 4: | ||
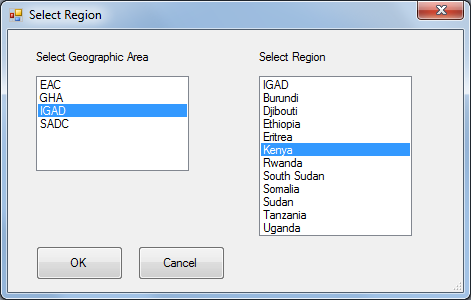
* The first time you run the GeoCLIM, you will get a dialog box prompting you to select a a geographic area. Select the geographic area you want to work in (e.g. IGAD). When you have selected a geographic area, you will be presented a list of "regions". Select your "region" of interest. When you have selected a geographic area and a region, click OK. | * The first time you run the GeoCLIM, you will get a dialog box prompting you to select a a geographic area. Select the geographic area you want to work in (e.g. IGAD). When you have selected a geographic area, you will be presented a list of "regions". Select your "region" of interest. When you have selected a geographic area and a region, click OK. | ||
[[File:0001_firstrun1.png]] | [[File:0001_firstrun1.png]] | ||
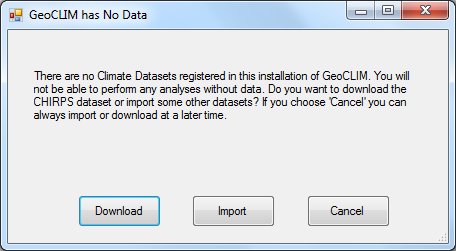
| − | * | + | * If this is the first time you are installing the program, GeoCLIM will detect that there is no GeoCLIM data on your computer and will prompt you whether you want to download or import some GeoCLIM data. |
| + | [[File:0001_firstrun02_ingest_geoclim_data1.png]] | ||
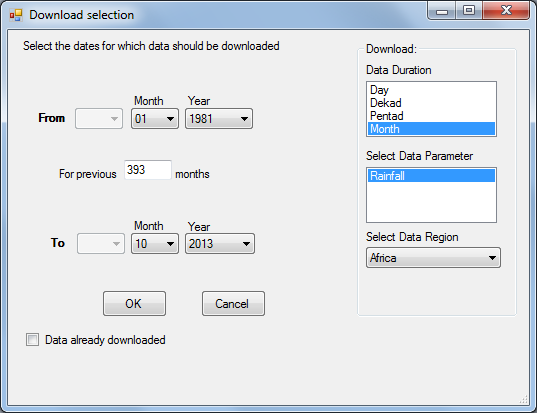
| + | * If you do have some data from the GeoCLIM CD, select to import the data, which will take a lot longer. If you do not have data to import, select the download option. You will get a box which looks like the one below. | ||
| + | [[File:0001_firstrun03_download_data1.png]] | ||
| + | * Select the data duration, the data parameter, and the data region as well as the dates you want to download data for. If you use the default, which is monthly rainfall data for Africa, the data begins at 1981, and you can select your dates accordingly, then click OK. | ||
| + | * Downloading all the data may take a few hours, depending on the speed of your connection. | ||
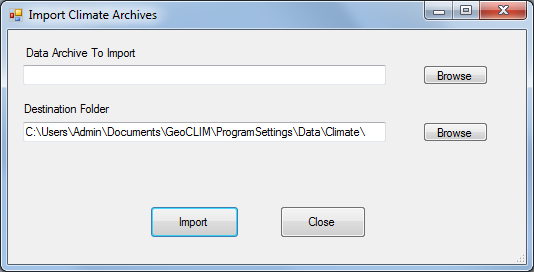
| + | * If you decided to import the data (which takes a much shorter time than downloading), you will be presented with the dialog box which looks like the one below: | ||
| + | [[File:0001_firstrun04_import_data1.png]] | ||
| + | * Press the browse button at the top right to select the GeoCLIM data archive, then click the "Import" button to import the data. | ||
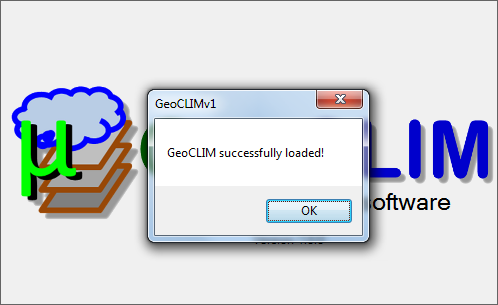
| + | * When you have finished ingesting data (either by downloading or installing), click the GeoCLIM icon in the Windows Taskbar, and you will see a message written "GeoCLIM successfully loaded". Click OK to close the message and you can start using GeoCLIM. | ||
[[File:0002_finished_loading_up.png]] | [[File:0002_finished_loading_up.png]] | ||
| + | * Press OK to start using the GeoCLIM | ||
| + | 0003_geoclim_interface.png | ||
Revision as of 13:40, 22 October 2013
Installation and set up
- After you have downloaded the GeoCLIM installation file GeoCLIM, click on the GeoCLIM msi file to install it. Accept all the defaults in the installation steps.
- You can run the GeoCLIM from the Start Menu or from the desktop.
- The first time you run the GeoCLIM, you will get a dialog box prompting you to select a a geographic area. Select the geographic area you want to work in (e.g. IGAD). When you have selected a geographic area, you will be presented a list of "regions". Select your "region" of interest. When you have selected a geographic area and a region, click OK.
- If this is the first time you are installing the program, GeoCLIM will detect that there is no GeoCLIM data on your computer and will prompt you whether you want to download or import some GeoCLIM data.
- If you do have some data from the GeoCLIM CD, select to import the data, which will take a lot longer. If you do not have data to import, select the download option. You will get a box which looks like the one below.
- Select the data duration, the data parameter, and the data region as well as the dates you want to download data for. If you use the default, which is monthly rainfall data for Africa, the data begins at 1981, and you can select your dates accordingly, then click OK.
- Downloading all the data may take a few hours, depending on the speed of your connection.
- If you decided to import the data (which takes a much shorter time than downloading), you will be presented with the dialog box which looks like the one below:
- Press the browse button at the top right to select the GeoCLIM data archive, then click the "Import" button to import the data.
- When you have finished ingesting data (either by downloading or installing), click the GeoCLIM icon in the Windows Taskbar, and you will see a message written "GeoCLIM successfully loaded". Click OK to close the message and you can start using GeoCLIM.
- Press OK to start using the GeoCLIM
0003_geoclim_interface.png
